Hello world! I can't believe I'm sitting down writing a blog post-- it feels surreal after being away for so long. Where have I been? The short answer is that until recently, my work schedule was so hectic that I didn't have a lot of extra time for blogging. We all know that blogging takes time! But now that my work situation has changed, I'm giving it a real, conscious effort to get back into the swing of things. But that's not what I want to talk about today! Today I wanna talk about my newest DIY project, so let's crack on.
So guess what-- I made myself a Fauxdori! If you're not sure what a Fauxdori is, it's a faux version of a Midori Traveler's Notebook. This video by Cori at The Reset Girl is a really great beginner's guide for newbies like me! I wasn't initially impressed with the concept when I first saw these online, but the more I see people using them, the more I realized the practicality in them. I have a big 8.5" x 11" leather notebook that usually houses all of my creative ideas & "brain dump" but lately I've found that I can't be bothered to drag that around with me in my purse. This means that a lot of valuable ideas have been falling through the cracks. I thought a Fauxdori would be a great alternative way to corral my creative brainstorming while I'm out & about until I can transfer them to my big journal at home.
There are some truly GORGEOUS choices available for purchase on etsy like here, here, & here, but unfortunately my bank account is lacking this week (& I'm an impatient person, so I obviously can't wait til payday). So I decided to take a shot at making my own.
I bought a 1/2 yard or 2 different fabrics, 1 yard of Pellon stabilizer interfacing, & a pack of round cord elastic. I already had rivets, charms, & the supplies for the inserts in my stash. Altogether with sales & coupons, everything cost me about $8.00! Holla!
This was a true blind date with this craft because I've never created one of these before. I couldn't find a decent tutorial that was really helpful on YouTube, so I just looked up the dimensions of a standard Midori insert on etsy and created my own pattern. I'm proud to say that everything turned out really well without incident!
I decided to dress it up by adding a little crystal at the top of the spine and a tassel on the strap. I can swap these out whenever and it gives it a little something extra. :)
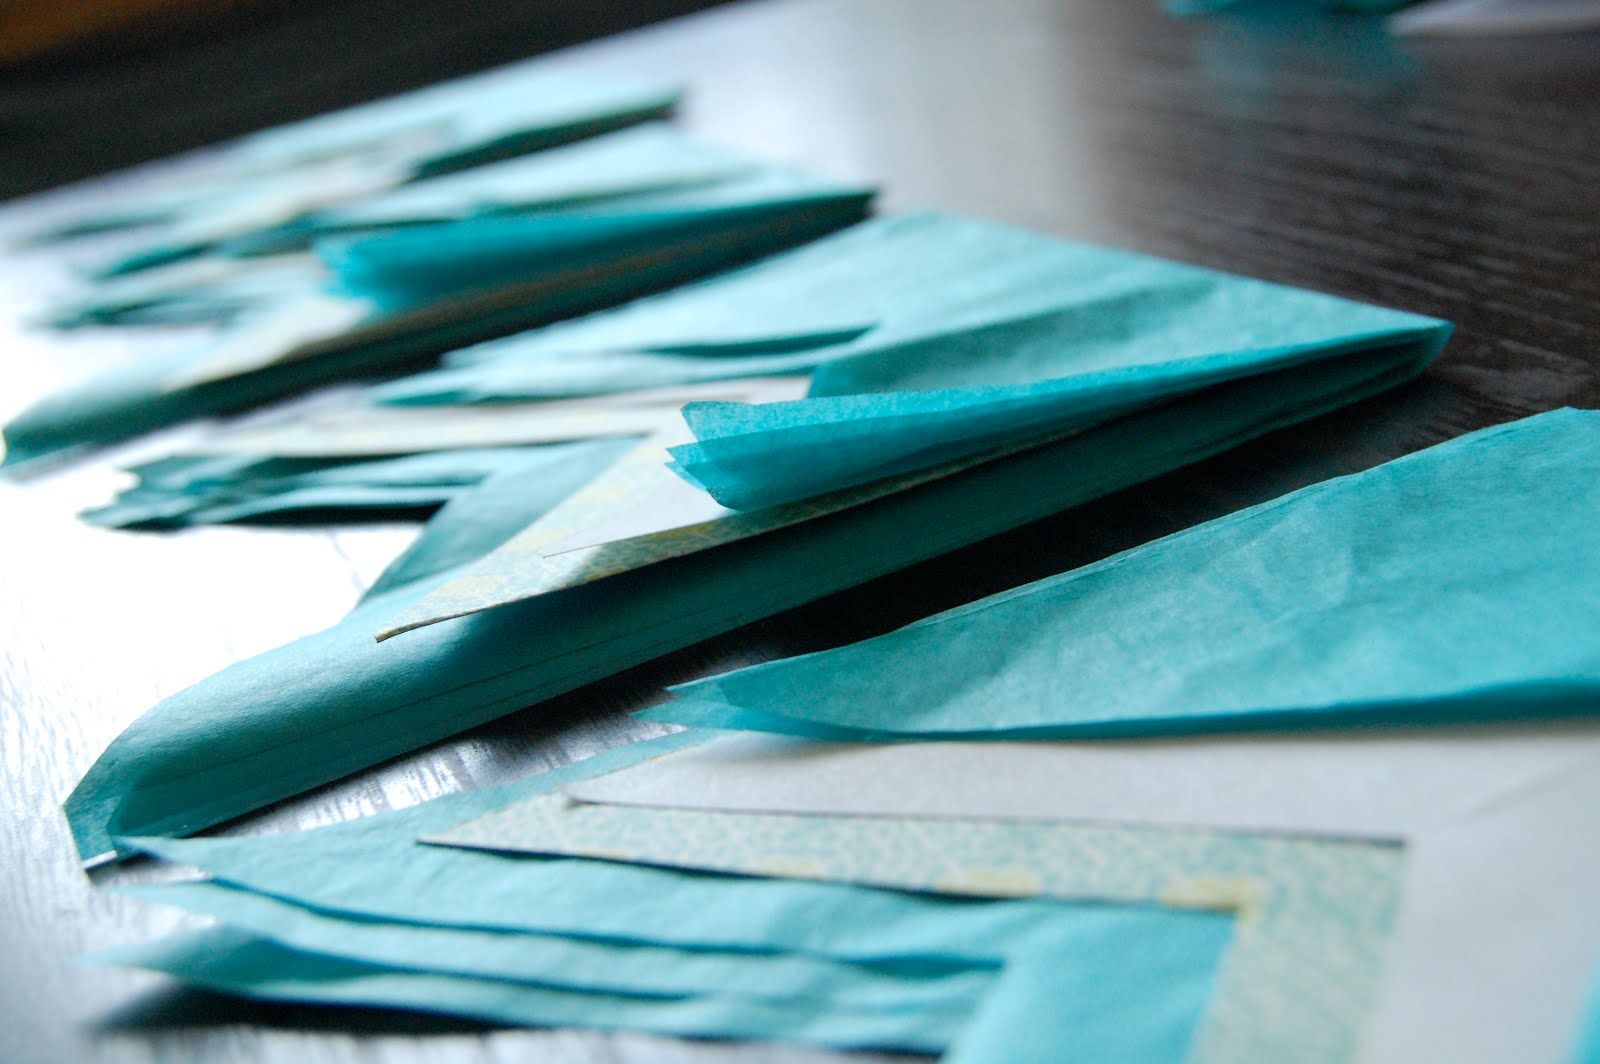
Instead of ordering & waiting for raw inserts to come (again-- impatient), I decided to just whip up some of my own with some scrap supplies & copy paper. Then I took the covers to my local Office Depot and got them laminated with 5mil lamination for a little extra stability.
I'm SO excited to start using this little beauty and hoping that my ideas don't get lost anymore! Do you have a Midori or a Fauxdori? I want to see it! Link me up!
Until next time,
E
Products used on inserts: Paper: Echo Park (Creative Agenda- 'Positively'), Studio Calico (Abroad COllection- 'First Class') Colorbök (orange heart pattern), Recollections (graph). Stickers: AC Remarks (black alphas), Heidi Swapp (words), MAMBI (soft spoken), Teresa Collins (black heart), Studio 112 (black tile alphas), Craftcake Designs (lightbulb). Embellishments: Maggie Holmes for Crate Paper (yellow bow clip), Planner Society (bow from July kit), Heidi Swapp for Project Life (card from My Favorite Things), Scotch (gemstone washi), Glitz (triangle washi) We R Memory Keepers (black design washi)
Showing posts with label projects. Show all posts
Sunday, September 6, 2015
Wednesday, December 5, 2012
DIY: Ceramic Plate Wall Art
Here's another little idea for an inexpensive, DIY gift that you can make for someone special. There are SO many things you can do with this project which is what makes it so much fun! It's one of those quick projects where you can just dump out everything in your craft arsenal and make it work! (Thank you Tim Gunn)
Supplies:
1. ceramic plate (you can find these at any craft or hobby store)
2. rub-ons or clear back stickers
3. ribbon
4. scissors
5. popsicle stick or bone folder
6. measuring tape
7. plastic gems
Step 1:
Measure the diameter of the flat portion of your plate to determine your useable area.
Step 2:
Choose your favorite rub-ons to use and peel the backing off. Hold it up to your plate to get an idea of how your design will look.
Step 3:
Cut out your design to cut down the excess material, then use your popsicle stick to firmly rub over the design to adhere it to the face of your plate. Carefully peel back the plastic.
Step 4:
Use ribbon to trim your plate or use as a hanger. I also decided to add some gems to mine to make it look like the dandelion is being blown away!
Misc Tips:
*Non-cardstock stickers work best like the flexible ones with clear backings.
*Get creative and decorate your plate with washi tape! It's cheap and repositionable!
*If you don't want to hang your plate on a wall, you can lay it on your dressing table and use it as a trinket dish for earrings!
I hope you liked this tutorial! When I hung mine up in our hallway, I got more than the obligatory "Good job, babe!" from Ian, so that's saying something!
<3
E
Labels:
Blog Party,
home decor,
projects,
tutorials
DIY: Tissue Confetti Ornaments
Oh how I love all the magnificent things you can do with tissue paper! These ornaments practically came to me in a dream after I saw some delicious ones from West Elm. Afterward, I couldn't get them out of my head! So here I am with a tutorial so you can make your own tissue confetti ornaments!
Supplies:
1. Glitter paper
2. colored tissue paper
3. double-sided tape or glue stick
4. raw kraft ornaments
5. scissors
6. Sharpie or pen
Step 1:
Cut a bunch of 1 inch strips of tissue paper of each color to use for your fringe. Trim the length of each strip down to be slightly longer than the width of your ornament.
Step 2:
Fold a strip in half length-wise and start snipping to create fringe.
Step 3:
Start at the bottom of your ornament and work upward. Tape or glue across the area to stick your first strip. (Full disclosure: I found that glue stick works best for this step because it's quicker, cheaper, stickier, and much stickier!)
Place your fringed strip across the adhesive area with a slight overhang on each side.
Step 4:
Slightly above the first strip, tape or glue again. Adhere another color of tissue to overlap the previous.
Repeat steps 3-4 until your entire ornament is covered.
Step 5:
Use your scissors to trim the excess tissue around the perimeter of your ornament.
Step 6:
Use glitter paper to create a monogram. Map out the letter on the backside using a marker and then cut them out.
Step 7:
Adhere your monogram to the center of your ornament using tape or glue.
You can use these ornaments all year round and for so many different things! Hang them on your Christmas tree, a doorknob, bedpost, or make a big one for your front door!
Also, you can always use tacky glue and loose glitter if you don't have access to glitter paper. It requires more steps, but the effect is the same!
I love the way these look. They're very on trend and there are so many different color combinations I'd love to try out!
Have fun with this and go crazy! These holiday ornaments sparkle and shine enough to make the season bright!
<3
E
Labels:
Blog Party,
holiday,
projects,
tutorials
Saturday, November 3, 2012
Semi-Secrets
Lately I've been hard at work on a "semi-secret:" Tori & I bought a booth space at a local craft fair on the 17th! It's not really a secret, but I've been waiting a bit to spill the beans until I have some pretty merchandise photos to share! Together, Tori and I are starting a new business venture together and it's been very exciting for both of us to brainstorm together and get super inspired for the upcoming fair.
These are some pics I snapped when I was sewing up our fun graphic mini pillows the other night. I'm kind of a little in love the color palette. :)
We have a long list of great merch and I can't wait to post some more peeks and info about our booth. We have A LOT of work to do in the next 2 weeks, so you'll be seeing more works in progress.
In other news, I'm very behind on Project Life, so I'm playing catch-up with that project while still trying to stay on top of blogging, photo editing, new sessions, and work. It's been a busy beehive in the Davis workshop this past month! Here's to even more inspiring vibes in November!
<3
E
Labels:
projects,
sew in love
Wednesday, October 31, 2012
Vintage Matchbook Re-Style
A few years ago, I was at a flea market that had little grab bags of vintage matchbooks and I couldn't pass them up. They were all so colorful and graphic that they just seemed perfect for some sort of project. I never knew what my plan for them was, but I figured it would come to me someday. Well recently, I came across the matchbooks again and the sight of them sparked an idea! I knew I had to frame them somehow and display them on the wall of our new apartment.
I got a square display frame at Hobby Lobby for 50% off and used a piece of subtle print scrapbook paper for the backing. Then it was just a matter of measuring out distances between each matchbook to make it symmetrical. (That took some time and I hate math. lol)
The project came together nicely and it's just waiting for me to decide where to hang it! Possibly in the hallway or far wall of the kitchen. Who knows. :) Ian LOVED the outcome too and was impressed at the impact those little pieces of cardboard made!
This project was SO easy to do, relatively inexpensive, and a great way to display vintage art and little pieces of history in your home. You could do this with literally anything you found at a flea market or antique mall and have a real conversation piece in your home!
<3
E
Labels:
home decor,
projects,
thrifting,
tutorials
Monday, October 22, 2012
Around our Home
The other day I got stitchy and made a cute little ghost pillow for our living room. I wanted something kitschy and Halloween for the armchair and decided that a pillow would be perfect!
It turned out adorable. The front is dark brown fabric to match our couch and the back is a spiced orange color with brown polka dots. The ghosts on the front are cut from a thick stiff piece of felt from the craft store and sewn on with my sewing machine! Easy peasy lemon squeezy!
Phoebe popped in for the shot and I couldn't resist a close-up. :)
I also livened up our cubicle top and half-wall with some favorite fall prints, a white woodgrain votive holder, and my favorite fall collection: my little ghost family!
I got that "Boo" sign at Hobby Lobby for only $4!
This little guy is a find from last year that I altered to make it more cute. I love the falltime and since it's my birthday on Halloween, that makes it extra dear to me!
<3
E
Labels:
home decor,
projects,
sew in love
Wednesday, October 10, 2012
DIY: Color Block Clipboards
Hello out there, friends! What's shakin'? Here's a nifty little project I did in less than an hour one night last week that's really brightened up my little studio! I got the inspiration from this tutorial and I decided to make it a little more neon! ha.
I already had one clipboard, so I bought another at Hobby Lobby for $1.20 with a 40% off coupon. The one I had at home... well... I wish I would have taken a "before" pic because it was atrocious. It was Ian's from when he was a kid and it had 80s black and gold reflective tape on it and an alien sticker-- TRUE! The one I bought was just plain kraft brown.
The one I bought from HL: all I did was tape it off with painter's tape, paint it, and let dry. It was already the kraft brown I wanted, so I didn't have to do anything else!
The 80s atrocity I already had: I knew that because of the material, paint wouldn't stick and peeling the reflective tape off wasn't an option because it was making the surface layers of the clipboard come off. So I decided to cover it with paper. I cut the kraft paper with an Exacto knife to fit it around the metal clip at the top and adhered it with some industrial double-sided tape I had. Then I cut the bottom teal portion to fit, taped it down, and then adhered the triangle.
I mounted them on the inside of my studio door with 3M picture hanging strips (the quasi-velcro kind), that way they can be removed and put back up!
So that's my quick (totally unoriginal but equally awesome) project that I made. I have another inspiration board too, but it's nice to have another space to clip pending project pieces or items waiting to go into my inspiration binders.
I just love a good neon color block!
<3 E *Note: I know these photos aren't great, but bloggers-- you know what it's like to be forced to photograph at night because you're at work in the day! First world problems...
Labels:
projects,
stolen ideas
Wednesday, June 27, 2012
The Gifting Guru
Ian and I had a wedding to go to a few weekends ago and, long story short, I was unable to procure my standard wedding gift. So we were I was forced to get creative! I was trying to figure out what I was going to do for a gift because we were slightly low on cash. I knew I wanted to do something graphic since I'm a photographer and all. So I'm thinking and thinking and then I saw THIS by Elise and I was inspired!
Elise created this very chic decor piece using an 8 x 10 simple black frame, white cardstock, and a single photostrip! I've seen things similar to this before on Pinterest, but this one really struck me as special.
I don't argue with inspiration and a good idea, so I channeled my inner Elise and ran with it. Now, I actually photographed this couple's engagement session, so I took images from their session and created my own homemade photostrip in Adobe Photoshop, then printed it on photo paper. Then I got a black frame on sale at Hobby Lobby and voila!
These photos are not fantastic because I actually forgot to take pictures of the gift until I got to the reception. So these are good 'ole iPod Touch pics. lol
But you can see how chic, modern, and personal it turned out. I wrote in Sharpie pen down the side of the strip their names and wedding date. Plus I added satin ribbon in their wedding colors and some houndstooth ribbon for good measure. ;) I'm obsessed with how it turned out.
I just thought someone might benefit from this gift idea because it's quick, inexpensive, handmade, and SO personal. This will hopefully be a keepsake that the couple will display in their newlywed nest and cherish for a long time!
If you would like to see a digital tutorial on how I created the photostrip, just let me know in the comments!
<3
E
Labels:
projects,
stolen ideas
Saturday, May 26, 2012
Creepy Cool
This is going to be a quickie quick post just showing off a project I finished last night. I've been on a rampage to get all of my "half-finished" and pending projects DONE! This one has been a brain child of mine since Halloween and I'm glad to wrap it up.
Yes-- I painted that human heart free hand. All I did was get an inexpensive tote bag from Hobby Lobby and paint right on the tote with acrylic paint. I just did a "dry brush" technique which allowed me to do some shading and such.
I just loved the idea of the "anatomy" theme accessories and wanted to make my own, so I did. :) (Have I used quotation marks too much in this post? I'm afraid so.) I'm trying to decide if I want to keep it or pop it in the etsy shop. What do you think? I'm also slightly afraid to wash it. Does anyone have tips for sealing acrylic paint on fabric? I don't even know if that's possible. Comment if you do!
Also: Phoebe wanted to say hi. :)
<3
E
Also: Phoebe wanted to say hi. :)
E
Saturday, May 12, 2012
DIY: Tissue Fringe Pennants
The mirror over my vanity has been looking a little sad, so I decided to make a little garland-type decoration to spruce it up! I really love the look of Mexican tissue paper art, so I came up with this tissue paper fringe pennant design and it turned out just like i pictured it! Here's a tutorial so you can make your own!
Supplies:
*paper trimmer
*tissue paper
*scrapbooking paper
*chipboard
*scissors
*stapler
*yarn
*tacky glue
*glitter
*optional: charms
Step 1:
Smooth out your tissue paper pack and fold it in half long-ways. Use the trimmer to cut 4.5" sections for your pennants. I cut 2 sections, then separated the layers to 3 or 4 layers each to create 5 sections for my garland. Trim the bottom part (the loose ends opposite the fold) to 5".
Step 2:
You can do 2 types of garland: chevron (with the point in the middle) or pennant (with the points on the outside). I chose to do the pennants, but either one would be gorgeous.
Make the cuts to the bottom of the section (the side with the loose ends), then open it up, and refold it higher on the section. (shown above)
Step 3:
Add in more layers of different papers to create color contrast.
Step 4:
Start cutting tiny vertical strips of fringe in 1 inch cuts. I cut the tissue layers at once, then cut the papers each separately so all your fringe doesn't end up looking the same.
Step 5:
Next, cut strips 1" x 4.5" of chipboard to place inside the pennants so that they will hold their shape once the garland is on the wall. Otherwise, the tissue will bend and crumple.
Step 6:
Open up the layers of your pennants and run your yarn through each one stringing them together. Make sure to leave enough yarn on each end of the garland so you can tie it up!
Step 7:
Staple the top edge of each pennant under the yarn making sure to get all the layers of paper in your staples.
Step 8:
Take some tacky glue and coat a thin layer over the staples and across the pennants. Pour glitter over the glue area and let sit. Shake off all the glitter and it's ready to hang! After you hang your pennants, you have the option to add any charms or tassels to your garland to give it some added flair! I used these glitter keys my Nana got me to hang on the edges of the garland!
I hope you loved the tutorial. It's been so much fun using my vanity now that I look up and see some colorful tissue garland staring back at me! It just adds fun and style to my makeup area! Have a wonderful evening and weekend everyone!
<3
E
Supplies:
*paper trimmer
*tissue paper
*scrapbooking paper
*chipboard
*scissors
*stapler
*yarn
*tacky glue
*glitter
*optional: charms
Step 1:
Smooth out your tissue paper pack and fold it in half long-ways. Use the trimmer to cut 4.5" sections for your pennants. I cut 2 sections, then separated the layers to 3 or 4 layers each to create 5 sections for my garland. Trim the bottom part (the loose ends opposite the fold) to 5".
Step 2:
You can do 2 types of garland: chevron (with the point in the middle) or pennant (with the points on the outside). I chose to do the pennants, but either one would be gorgeous.
Make the cuts to the bottom of the section (the side with the loose ends), then open it up, and refold it higher on the section. (shown above)
Step 3:
Add in more layers of different papers to create color contrast.
Start cutting tiny vertical strips of fringe in 1 inch cuts. I cut the tissue layers at once, then cut the papers each separately so all your fringe doesn't end up looking the same.
Step 5:
Next, cut strips 1" x 4.5" of chipboard to place inside the pennants so that they will hold their shape once the garland is on the wall. Otherwise, the tissue will bend and crumple.
Step 6:
Open up the layers of your pennants and run your yarn through each one stringing them together. Make sure to leave enough yarn on each end of the garland so you can tie it up!
Staple the top edge of each pennant under the yarn making sure to get all the layers of paper in your staples.
Step 8:
Take some tacky glue and coat a thin layer over the staples and across the pennants. Pour glitter over the glue area and let sit. Shake off all the glitter and it's ready to hang! After you hang your pennants, you have the option to add any charms or tassels to your garland to give it some added flair! I used these glitter keys my Nana got me to hang on the edges of the garland!
I hope you loved the tutorial. It's been so much fun using my vanity now that I look up and see some colorful tissue garland staring back at me! It just adds fun and style to my makeup area! Have a wonderful evening and weekend everyone!
<3
E
Subscribe to:
Posts (Atom)