

I haven't done a tutorial in SO long so I decided to get creative. As most of you know, I've been going through a creative slump due to changing medications and what not, but I'm starting to get back in the groove!
Since I'm OBSESSED with decorating every INCH of my home, this project stemmed from needing something cute for our fridge. I've been really inspired by kites lately for springtime, so I thought that some handmade kite magnets would be something really cute I could do to get back into gear! Let's get started!
Supplies:
If you're an avid crafter or artist, you might have much of this stuff around the house so this project is super cheap!

*a few colors of Polymer Clay (Sculpey)
*pasta maker or rolling pin
*cutting board
*blade
*stylus
*yarn
*scissors
*magnets
*aluminum foil
*cookie sheet
*super glue
*oven
*ribbon scraps
Step 1:
PREHEAT YOUR OVER TO 275ºF in order for your clay to bake.
Step 2:

Start by breaking off a small amount of clay from each of your colors and rolling them in a ball to soften them. Then stick each of them into your pasta maker one at a time to make a sheet (my pasta maker was on the #4 setting). You can also use a rolling pin for this step. You want your kite to be a good thickness so it doesn't break easily, but not too thick that your magnet can't hold it up!
Step 3:

Using your blade or knife, cut your sheet of one color clay into a diamond. You can also lightly cross hatch your diamond from point to point vertically and horizontally so that you can see the kite design taking shape.
Step 4:

Now it's time to decorate your kite with your complementing colors of clay however you like! You can use textured items or rubber stamps to make designs in the clay, cut out shapes to attach to your kite or just decorate each kite quadrant with your stylus.

I chose to make a grid on opposite quadrants and then outline the other 2 with different clay colors. Making the quadrants complementary and visually exciting will make for a better impact on your kites!
Step 5:
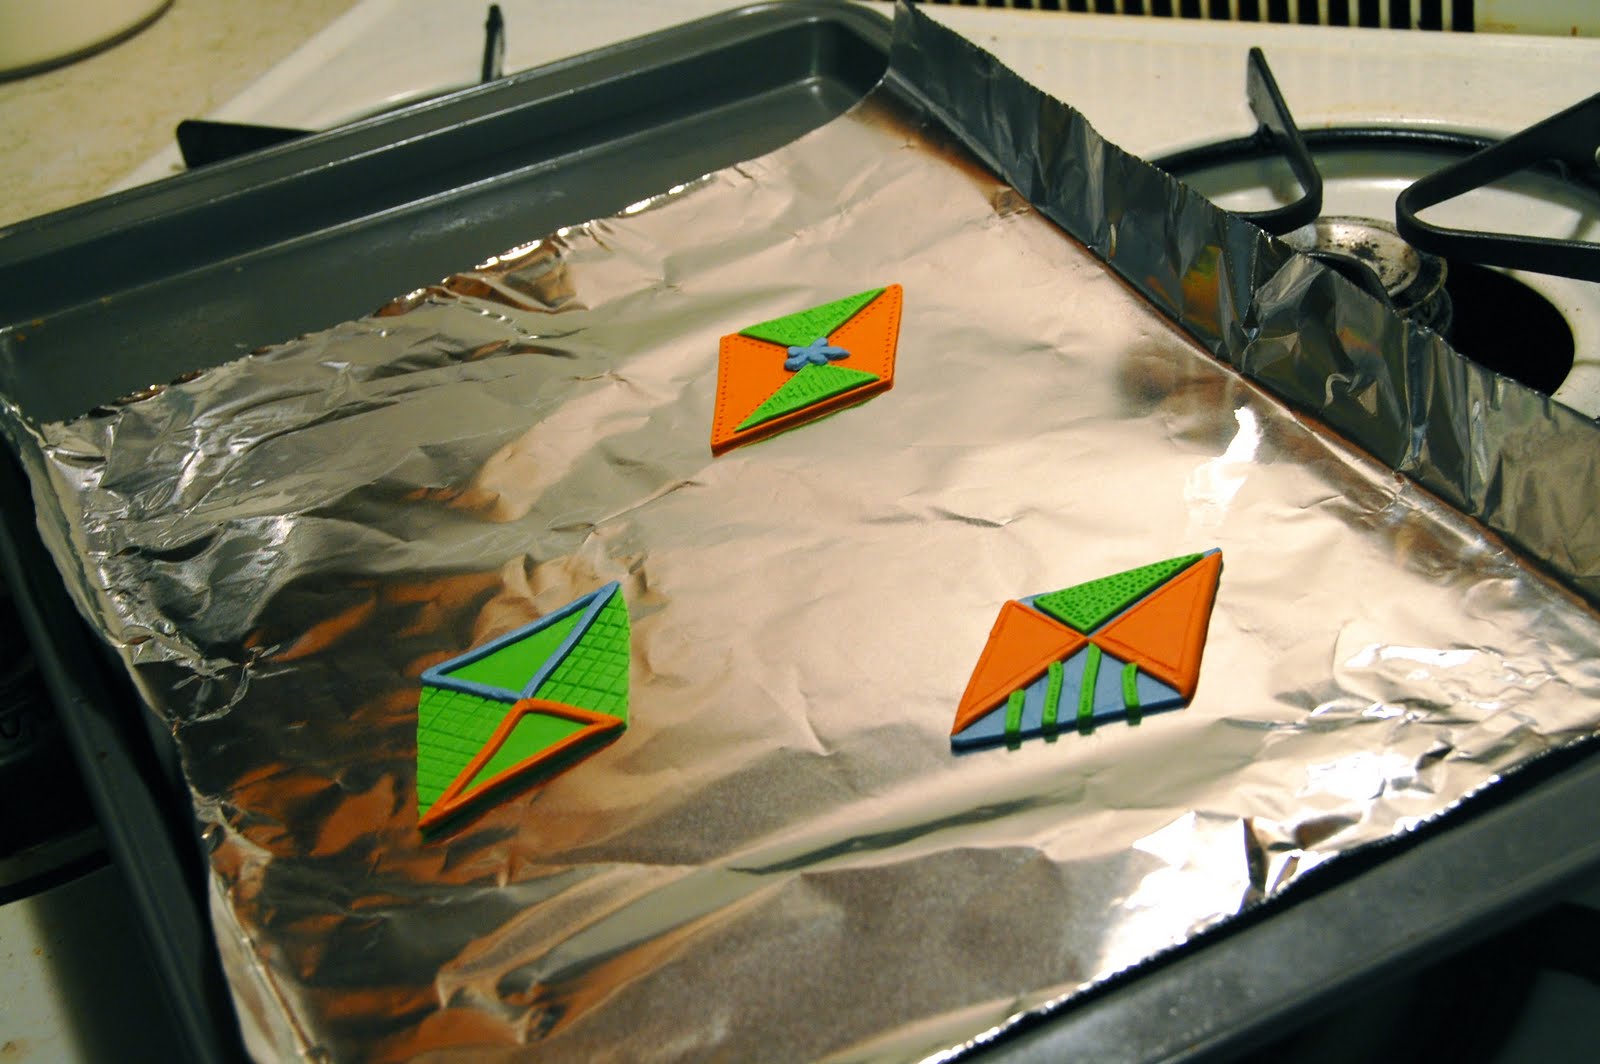
Next, line a cookie sheet with wax paper or aluminum foil and carefully place your kites onto the cookie sheet. Bake the clay at 275ºF for approximately 5-7 minutes. (For every 1/4 of an inch of clay, you bake it for 16 minutes, but since ours is very thin, you can use less time)
After your clay is done baking, let sit for about a minute, then run each piece under cold water to harden.
Step 6:

Cut a small length of yarn and use super glue to adhere to the back of the kite to make the tail. You can tie little ribbons on the tail to make cute bows for your mini kites!
Also, super glue your magnets to the back of the kites. (Hint: at Hobby Lobby, you can buy the raw magnets in different strengths. I bought mine in strength level 6 because I wanted them to be able to hold thick postcards!)
And you're done!

I love the way they look like they're flying around in the spring air on my refrigerator! They brighten up the kitchen so much and just make everything look a little more cheery. If you don't have access to polymer clay or aren't interested in getting any, you can always substitute felt plastic canvas, or simply card stock for this project! I thought that clay would make it a little more 3D and lively, but there are so many products out there! Experiment and fly your own kite!
<3
E
4 comments:
these are so cute and ready to "fly" (hang) on the refrigerator!! i would like to make them. lol.
Love you and Miss you!!
Ann
awwe these are sooo cute! i have a bunch of polymer clay, that I havent been using, but NOW i know just what to make! :)
this is too cute! i will definitely have to try this!
I love your craft tutorials...they are adorable!
Megan
wow those are so cute!! i want to do this :)
Post a Comment